Insulating a Basement or Cellar: Tanking, Damp and Conversion Guide

Basement insulation UK projects are fundamentally different from insulating any other part of a house. Below-ground walls are in constant contact with damp earth, hydrostatic water pressure pushes moisture through the masonry, and the consequences of getting the waterproofing wrong are severe. This guide explains why basements must be properly waterproofed before any insulation is installed, covers the main tanking and cavity drain methods, walks through insulation material choices for below-ground applications, and provides realistic costs for both basic insulation and full cellar conversions.
How to Insulate a Basement or Cellar
- Fix any damp problems first — apply tanking slurry or a cementite membrane to walls showing signs of water ingress
- Insulate the basement ceiling — fit rigid insulation boards or mineral wool between joists to stop heat escaping from the ground floor above
- Insulate basement walls if converting — use insulated plasterboard or rigid PIR boards with a vapour barrier on the warm side
- Address the floor — lay rigid XPS insulation over a damp-proof membrane if the floor is being replaced or levelled
- Install adequate ventilation — add airbricks, mechanical extraction or a PIV unit to prevent trapped moisture causing mould
- Check building regulations — basement conversions to habitable rooms require building control approval and may need fire escape routes
Insulating the basement ceiling alone costs £500 to £1,500 and is the simplest option for homes using the cellar only for storage. A full basement conversion with tanking, insulation and finishing costs £15,000 to £40,000 depending on size and specification. Always resolve damp before insulating — trapping moisture behind insulation causes structural damage and mould growth.
Why Basements Must Be Waterproofed Before Insulating
The fundamental challenge with basements is water. Below-ground walls are surrounded by wet soil, and moisture enters the basement through three main mechanisms:
- Hydrostatic pressure: Groundwater pushes against the external wall surface. In areas with high water tables, this pressure can force water through the smallest crack or pore in the masonry.
- Capillary action: Moisture wicks upward through the porous masonry by capillary suction, even without significant hydrostatic pressure.
- Vapour diffusion: Water vapour passes through the wall from the damp soil side to the drier interior side.
If you insulate a basement wall without addressing these moisture sources, the insulation becomes a trap. Moisture accumulates behind or within the insulation, creating ideal conditions for mould, rot and structural damage. In severe cases, water pooling behind insulation can go undetected for months or years, causing extensive damage before the problem becomes visible.
The correct approach is always to waterproof first, then insulate. This applies whether you are simply reducing heat loss through an existing cellar or carrying out a full habitable conversion.
Tanking Slurry: Barrier Waterproofing for Basements
Tanking slurry is a cementitious waterproofing coating applied directly to the internal surface of below-ground walls and floors. It creates a continuous waterproof barrier that prevents moisture from passing through the masonry into the basement interior.
How Tanking Slurry Works
The slurry is a blend of Portland cement, specially graded aggregite, and chemical waterproofing agents. When applied to a damp masonry surface, it penetrates into the pores and reacts chemically with free lime in the masonry to form an integral waterproof bond. Multiple coats are applied to build up a robust barrier.
Key products include Vandex BB75 (one of the most widely specified tanking slurries in the UK), Sika 1 Pre-Bagged Waterproofing and RIW Toughseal.
Application Process
- Surface preparation: All loose material, paint, plaster and efflorescence must be removed to expose clean masonry. The surface must be damp but not actively running with water.
- First coat: Mixed to a thick slurry consistency and brushed onto the wall in horizontal strokes. Coverage approximately 3-4 m2 per 25kg bag.
- Second coat: Applied once the first coat has firmed up (typically 2-4 hours), in vertical strokes to ensure full coverage.
- Floor tanking: The slurry is also applied to the floor, with the wall and floor coatings overlapping at the wall-floor junction to create a continuous waterproof “tray”.
- Curing: The tanking must be kept damp for at least 48 hours to cure properly. This is counter-intuitive but essential for cement-based products.
Tanking slurry costs approximately GBP 30-50 per m2 professionally applied, or GBP 10-15 per m2 for materials if applied as a DIY project.
Limitations of Tanking Slurry
Tanking slurry works well against moderate moisture ingress and capillary damp. However, it relies on the bond between the slurry and the masonry to resist water pressure. In basements with high water tables or significant hydrostatic pressure, the water can push the tanking slurry away from the wall, causing failure. For these situations, cavity drain membranes are the more reliable solution.
Cavity Drain Membranes: Managing Water Rather Than Blocking It
Cavity drain membrane systems take a fundamentally different approach to basement waterproofing. Rather than trying to prevent water from entering the basement, they accept that water will come through the wall and manage it by channelling it safely to a drainage point.
How Cavity Drain Systems Work
A dimpled HDPE (high-density polyethylene) membrane is fixed to the internal face of the basement wall, standing off from the masonry by approximately 8mm (the depth of the dimples). This creates a continuous air gap between the wall and the membrane.
Any water that passes through the masonry enters this air gap and runs down by gravity to a perimeter drainage channel at the base of the wall. The channel directs the water to a sump, where a pump removes it to a surface water drain, soakaway or combined sewer (with permission from the water authority).
Key advantages of cavity drain systems:
- No reliance on bonding to the masonry; works even with high hydrostatic pressure
- Any leaks through the wall are managed rather than causing failure
- The system can be inspected through access points in the drainage channel
- The membrane provides a stable, dry surface for insulation and finishing
Leading UK suppliers include Newton Waterproofing (Newton System 500), Delta Membrane Systems and Triton Systems.
Typical costs for a cavity drain system with sump pump: GBP 80-150 per m2 of wall area, professionally installed. This includes the membrane, drainage channel, sump pump and electrical connection.
Insulation Options for Below-Ground Basement Walls
Once the basement is properly waterproofed, insulation can be added to the internal face of the waterproofed walls. The choice of material depends on the waterproofing method used and the final finish required.
| Insulation Material | Typical Thickness | Lambda (W/mK) | Cost per m2 | Notes |
|---|---|---|---|---|
| PIR rigid board | 50-75mm | 0.022 | GBP 10-18 | Best thermal performance per mm; must be behind plasterboard |
| EPS (expanded polystyrene) | 75-100mm | 0.032-0.038 | GBP 5-10 | Budget option; good moisture resistance |
| Mineral wool slabs | 75-100mm | 0.035 | GBP 6-12 | Only suitable with cavity drain systems (needs dry conditions) |
| Closed-cell spray foam | 50-75mm | 0.022-0.028 | GBP 25-40 | Seamless application; excellent airtightness |
For basements with cavity drain membranes, insulation is typically fixed to the face of the membrane using adhesive or mechanical fixings through the dimples. The insulation is then covered with plasterboard on a timber or metal stud framework to create a finished wall.
For tanked basements, insulation can be adhesive-bonded directly to the tanked surface using dot-and-dab or a continuous adhesive layer. Insulated plasterboard (pre-bonded PIR + plasterboard) is a convenient single-product solution for this application.
Building Regulations for Habitable Basement Rooms
If you are converting a cellar or basement into a habitable room (bedroom, living room, home office), the work must comply with Building Regulations. The main requirements include:
- Structural adequacy: The existing structure must support any additional loads, including new floor finishes and partition walls
- Fire safety: Means of escape, fire detection, fire-resistant construction between floors and a protected staircase are all required under Approved Document B
- Ventilation: Natural or mechanical ventilation must be provided to habitable basement rooms. Approved Document F specifies minimum air change rates.
- Ceiling height: While there is no absolute minimum ceiling height in the Building Regulations, a minimum of 2.1 metres is generally expected for habitable rooms, and 2.3 metres is preferred
- Thermal performance: Walls must achieve a maximum U-value of 0.30 W/m2K for a basement conversion (renovation target). Floors must achieve 0.25 W/m2K.
- Damp-proofing: The basement must be adequately waterproofed to prevent moisture ingress that could affect health or damage the building
- Drainage: If the basement is below the level of the external drains, a pumped drainage system may be required for wastewater from any sanitary fittings
Building Regulations approval (either through a full plans application or a building notice) is required before converting a basement to habitable use. The work must be inspected by building control at key stages.
Realistic Costs for Basement and Cellar Conversions
Basement conversion is one of the most expensive home improvement projects, but it can add significant value to a property, particularly in areas where land prices are high and additional floor space is at a premium.
| Scope of Work | Typical Cost (30-40m2 cellar) |
|---|---|
| Tanking slurry only (basic waterproofing) | GBP 2,000-4,000 |
| Cavity drain system with sump pump | GBP 5,000-10,000 |
| Insulation and plasterboard finishing | GBP 3,000-6,000 |
| Electrical installation (lighting, sockets) | GBP 1,500-3,000 |
| Floor insulation and screed or floating floor | GBP 2,000-4,000 |
| Staircase upgrade for fire safety | GBP 1,500-3,000 |
| Ventilation system | GBP 800-2,000 |
| Total basic habitable conversion | GBP 15,000-30,000 |
A full conversion with bathroom, kitchenette and high-quality finishes can reach GBP 40,000-60,000 or more. At the other end of the scale, simply waterproofing and insulating an existing cellar for use as dry storage costs GBP 5,000-12,000.
A well-insulated basement adds usable living space and reduces overall heat loss from the ground floor rooms above. Combined with efficient heating from a heat pump or modern boiler, a converted basement becomes a comfortable, energy-efficient addition to the home. Get a free quote to explore options for your property.
Frequently Asked Questions
Can I tank a basement myself as a DIY project?
Applying tanking slurry is technically a DIY-feasible task, as the materials are available from builders’ merchants and the application process is similar to rendering. However, the consequences of failure are severe: a tanking system that leaks requires complete removal and re-application, and any insulation or finishes installed over it may need replacing. For this reason, most specialist contractors recommend professional application with a guarantee. Cavity drain membrane systems should always be professionally installed.
Do I need planning permission for a basement conversion?
Converting an existing cellar into habitable space does not normally require planning permission, as it constitutes a change of use within the existing building envelope. However, Building Regulations approval is always required. If the conversion involves underpinning or lowering the floor level to gain headroom, this is more complex and may require structural calculations and party wall agreements with neighbours. Excavating a new basement beneath an existing house almost always requires planning permission and is a major engineering project.
How do I know if my basement is suitable for conversion?
Key factors include: ceiling height (ideally 2.3 metres or above; below 2.1 metres is generally impractical), structural condition of the walls and floor, water table level and history of flooding or damp, access (staircase requirements) and ability to provide ventilation and natural light. A specialist basement survey costs GBP 500-1,000 and provides a detailed assessment of suitability, recommended waterproofing method and budget estimate.
What happens if the sump pump fails?
Sump pump failure in a cavity drain system can lead to water accumulating in the drainage channels and eventually backing up into the basement. To mitigate this risk, most professional installations include a dual pump system (two pumps in the same sump, either alternating or with one as a backup) and a battery backup or generator connection for power cuts. High-level alarms that alert the homeowner to rising water levels in the sump are strongly recommended. Annual pump servicing is essential.
Will basement insulation reduce damp in the rooms above?
Yes. An uninsulated, damp basement contributes to higher humidity levels in the rooms above, as moisture migrates upward through the floor structure. Properly waterproofing and insulating the basement reduces this moisture transfer, making ground-floor rooms drier and more comfortable. It also reduces heat loss through the ground floor, as the insulated basement acts as a thermal buffer between the heated living space and the cold ground.
See what these numbers mean for your home
Free instant estimate — costs, savings, payback and grants for your region.
Related Articles
Home Insulation Costs and Grants: Your Complete 2026 Guide
Update (June 2026): ECO4 closed to new applications in March 2026. Approved installations continue to December 2026. The Warm Homes: Local Grant is now the main funding route for insulation.…
18 May 2026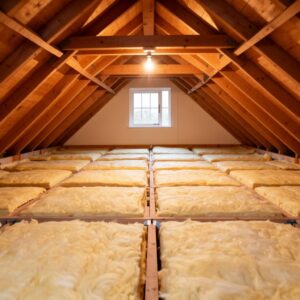
How to Reduce Condensation and Damp While Keeping Your Home Warm
Learn why condensation forms in UK homes, the difference between condensation and rising damp, and proven ventilation strategies to fix damp without losing heat.
8 May 2026
Conservatory Roof Replacement: How a Solid Roof Cuts Energy Bills and Adds Value
Replacing an old polycarbonate or glass conservatory roof with a solid insulated roof can slash heat loss, cut energy bills and turn a seasonal room into a year-round living space.
6 May 2026