How to Insulate a Bathroom: Walls, Floors and Moisture Control

Bathrooms are among the hardest rooms in a home to insulate correctly. The combination of high moisture levels, temperature swings, and often poor ventilation creates conditions where the wrong insulation approach can do more harm than good. This guide to bathroom insulation UK homeowners can rely on covers which materials resist moisture, how to avoid cold bridging around baths and showers, and the ventilation requirements that keep everything working properly.
How to Insulate a Bathroom
- Insulate external walls — fit moisture-resistant insulated plasterboard with a foil-backed vapour barrier to prevent warm, damp air reaching the cold wall surface
- Insulate the floor — for ground-floor bathrooms, install rigid foam board below the screed or between joists, using a minimum 75mm thickness
- Add a vapour control layer — seal all insulation joints with vapour tape to stop moisture migrating into the wall or floor structure
- Tile over a waterproof membrane — apply a tanking membrane or liquid waterproofer before tiling to protect the insulation behind
- Ensure adequate ventilation — fit a humidity-sensing extractor fan rated at a minimum 15 litres per second to remove moisture quickly after showers
- Insulate hot water pipes — lag all exposed pipes with 19mm foam tube insulation to reduce heat loss and prevent condensation dripping
Bathrooms are the most moisture-intensive room in the home, so every insulation detail must include proper moisture management. Skipping the vapour barrier or using non-moisture-resistant materials can lead to trapped condensation, timber rot and mould growth within months. If your bathroom has persistent damp problems, address ventilation first before adding insulation.
Why Bathroom Insulation Needs Special Attention
A typical bathroom produces 1.5 to 2 litres of water vapour per shower session and up to 3 litres from a bath. This moisture-laden air hits every surface in the room, and if those surfaces are cold, condensation forms instantly. Without appropriate insulation and ventilation, this daily moisture assault leads to mould growth, degraded plaster, peeling paint, and potentially rot in timber framing.
The challenge is that standard insulation materials and installation methods used elsewhere in the house may not be suitable for the bathroom environment. Materials must either resist moisture inherently or be protected from it by effective vapour barriers and ventilation.
Bathroom Wall Insulation: Material Options
Bathroom external walls are a priority because they are the coldest surfaces and the most likely to suffer condensation. The insulation material must perform well in a high-humidity environment.
Closed-cell spray foam
Closed-cell spray foam is inherently moisture-resistant because its cell structure does not absorb water. It also acts as its own vapour barrier, preventing moisture from reaching the wall behind. Applied between studs or directly to the inner face of a masonry wall, closed-cell foam achieves excellent U-values in minimal thickness. Costs range from GBP 35 to GBP 55 per square metre installed.
PIR boards with foil facing
Foil-backed PIR insulation boards are a popular choice for bathroom walls. The foil facing acts as a vapour barrier, and PIR itself has very low moisture absorption. Boards can be adhesive-bonded directly to masonry walls (dot and dab method) or mechanically fixed. The foil face should face the warm side (into the room). Insulated plasterboard combining PIR insulation and a plasterboard facing in one product simplifies installation and costs around GBP 20 to GBP 35 per square metre for the board alone.
Foil-backed plasterboard
For walls where space is extremely limited, foil-backed plasterboard provides a modest thermal improvement plus a vapour barrier in a single thin layer. It will not dramatically change the U-value but can prevent the worst surface condensation on cold walls. Costs are similar to standard plasterboard at GBP 8 to GBP 14 per square metre.
Materials to avoid in bathrooms
Standard mineral wool without a vapour barrier is not ideal for bathroom walls. While mineral wool is an excellent insulator, it absorbs moisture readily and loses thermal performance when damp. If mineral wool is used in a bathroom, it must be protected by a continuous, well-sealed vapour control layer on the warm side, which adds complexity and cost.
Insulating the Bathroom Floor
A cold bathroom floor is deeply unpleasant underfoot and contributes to overall heat loss from the room. The approach depends on your floor construction.
Suspended timber floors
If your bathroom has a suspended timber floor with a void beneath, insulation can be fitted between the floor joists from below (if there is access to the void) or from above when the floor is being replaced. Rigid PIR boards cut to friction-fit between the joists work well, as they do not absorb moisture that might drip from a leaky bath or shower. Support them with battens or netting. A typical installation achieves a U-value of around 0.22 W/m2K with 75mm PIR.
Solid concrete floors
Insulating a solid floor beneath bathroom tiles requires adding insulation on top of the existing slab. This raises the floor level, which can create issues with door clearances and the heights of sanitary fittings. Thin insulation boards (20 to 30mm of PIR) beneath a tile backer board provide a worthwhile improvement without excessive height build-up. Expect the floor level to rise by 30 to 45mm once insulation, backer board, adhesive, and tiles are accounted for.
If you are installing underfloor heating beneath bathroom tiles, insulation below the heating element is essential to prevent heat being lost downward into the slab. A 20mm insulation board beneath the heating mat or cable directs warmth upward into the room rather than into the ground.
Cold Bridging Around Baths and Showers
Cold bridging occurs where the insulation is interrupted, creating localised cold spots. In bathrooms, the most common cold bridges are:
- Behind the bath: A bath against an external wall creates a hidden cold spot. The wall behind the bath is often left uninsulated because it is inaccessible once the bath is fitted. Moisture from bathing condenses on this cold, hidden surface, leading to mould growth that goes undetected until the bath is eventually removed.
- Around shower enclosures: Similar to baths, the wall area behind a shower tray and within the shower enclosure can suffer from cold bridging if the external wall is not insulated.
- Window reveals: The sides and top of a window opening (the reveals) are often thin masonry with no insulation, creating cold strips that attract condensation.
- Behind tiles on external walls: Tiles are cold to the touch because they conduct heat. On an uninsulated external wall, tiled surfaces are the first place condensation will form.
The solution is to insulate these areas before fitting the bath, shower, or tiles. Even a thin layer of insulated plasterboard (25mm PIR + 12.5mm plasterboard) on the external wall behind a bath makes a significant difference. If the bath is already fitted, accessing the wall behind is difficult, but spray foam injected through small holes can insulate the void if there is sufficient cavity.
Bathroom Insulation UK: Extractor Fan Requirements
No amount of insulation will prevent moisture problems in a bathroom without adequate ventilation. Approved Document F of the Building Regulations sets minimum ventilation rates for bathrooms.
| Requirement | Specification |
|---|---|
| Intermittent extract rate (during and after bathing) | 15 litres per second minimum |
| Overrun timer | 15 to 30 minutes after switching off |
| Background ventilation (trickle vent) | 2,500mm2 equivalent area |
A humidity-sensing extractor fan is the best option for a bathroom. It activates automatically when humidity rises and continues running until moisture levels drop back to normal. This prevents the common problem of occupants forgetting to switch the fan on or switching it off too soon. Good humidity-sensing fans cost between GBP 80 and GBP 200 installed.
If your bathroom lacks a window and relies solely on mechanical ventilation, the extract rate must be continuous at a minimum of 8 litres per second, boosted to 15 litres per second during use. This typically requires a fan running on a low-speed setting permanently, which costs only a few pounds per year in electricity.
Insulating Bathroom Ceilings and Loft Spaces Above
If the bathroom is on the top floor with a cold loft above, the ceiling is a major source of heat loss and condensation risk. Warm, moist air rises directly from the shower to the ceiling, where it meets the cold surface and condenses.
Standard loft insulation at 270mm mineral wool above the bathroom ceiling is essential. Additionally, ensure there are no gaps around pipes, cables, or the extractor fan duct that allow moist air to leak into the loft space. Moist bathroom air entering a cold loft is one of the most common causes of loft condensation problems.
Seal around all penetrations through the bathroom ceiling with expanding foam or appropriate sealant. The extractor fan duct should be insulated along its length through the loft to prevent condensation forming inside the duct and dripping back into the bathroom.
Costs for a Complete Bathroom Insulation Upgrade
| Element | Typical Cost |
|---|---|
| External walls (PIR insulated plasterboard, 8-10m2) | GBP 200 to GBP 450 |
| Floor insulation (beneath new tiles, 5-8m2) | GBP 150 to GBP 350 |
| Ceiling insulation (loft above, if not already done) | GBP 50 to GBP 100 |
| Humidity-sensing extractor fan | GBP 80 to GBP 200 |
| Cold bridge treatment (behind bath, window reveals) | GBP 100 to GBP 250 |
| Total bathroom insulation package | GBP 580 to GBP 1,350 |
These costs are often incorporated into a bathroom renovation budget, making them far more affordable than standalone projects. If you are planning a bathroom refit, it makes excellent sense to address insulation at the same time, while walls and floors are exposed and accessible.
For help planning your bathroom insulation as part of a wider home energy efficiency upgrade, request a free assessment from our team.
Frequently Asked Questions About Bathroom Insulation
Can I use standard plasterboard in a bathroom?
Standard plasterboard is not recommended for areas that will be regularly exposed to moisture, such as above the bath or in the shower zone. Use moisture-resistant plasterboard (often coloured green or blue) in these areas. For areas behind tiles that will be directly splashed, a cement-based tile backer board is more appropriate than any type of plasterboard.
Should I insulate behind a shower enclosure?
Yes, always insulate the external wall behind a shower enclosure before installing the shower. Cold bridging behind the shower creates hidden condensation that leads to mould and can damage the wall structure over years. Even 25mm of PIR insulated plasterboard makes a meaningful difference and takes up minimal space.
Will insulating my bathroom walls stop mould?
Insulation raises the surface temperature of the walls, reducing condensation and therefore reducing mould growth. However, insulation alone is not enough. You must also have adequate ventilation to remove moisture-laden air. The combination of warm wall surfaces (from insulation) and effective moisture removal (from ventilation) is what prevents mould long-term.
Is underfloor heating worth it in a bathroom?
Underfloor heating is particularly effective in bathrooms because it warms the floor surface, eliminating the unpleasant chill of cold tiles, and helps dry the floor after use. Electric underfloor heating mats beneath tiles cost around GBP 40 to GBP 60 per square metre installed. Running costs are modest because bathroom floors are small, and the system is typically used for only a few hours per day. Insulation beneath the heating element is essential to direct warmth upward.
See what these numbers mean for your home
Free instant estimate — costs, savings, payback and grants for your region.
Related Articles
Home Insulation Costs and Grants: Your Complete 2026 Guide
Update (June 2026): ECO4 closed to new applications in March 2026. Approved installations continue to December 2026. The Warm Homes: Local Grant is now the main funding route for insulation.…
18 May 2026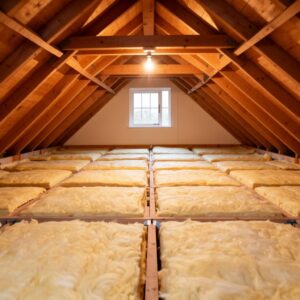
How to Reduce Condensation and Damp While Keeping Your Home Warm
Learn why condensation forms in UK homes, the difference between condensation and rising damp, and proven ventilation strategies to fix damp without losing heat.
8 May 2026
Conservatory Roof Replacement: How a Solid Roof Cuts Energy Bills and Adds Value
Replacing an old polycarbonate or glass conservatory roof with a solid insulated roof can slash heat loss, cut energy bills and turn a seasonal room into a year-round living space.
6 May 2026