Condensation, Damp and Mould After Insulation: Causes and Solutions

You have just spent good money improving your home’s insulation, yet within weeks the windows are running with condensation and dark mould spots are appearing in the corners of your bedrooms. Damp after insulation is one of the most common complaints among UK homeowners who have upgraded their loft, wall, or floor insulation. The good news is that the causes are well understood and the solutions are proven, provided you identify the right type of damp and tackle it correctly.
Why Does Damp and Mould Appear After Insulation?
Damp and mould can appear after insulation is installed because the insulation changes how moisture moves through your home. A warmer, more airtight house traps moisture from cooking, bathing and breathing, and if ventilation is not upgraded to compensate, condensation forms on cold surfaces such as window reveals, external wall corners and behind furniture. This is the most common cause of post-insulation damp problems.
How to Fix Damp and Mould After Insulation
- Improve ventilation — install trickle vents in windows, fit humidity-sensing extractor fans in kitchens and bathrooms, or consider a whole-house mechanical ventilation system (MVHR)
- Check for missing vapour barriers — if internal wall insulation was fitted without a vapour control layer, warm moist air condenses inside the wall structure
- Inspect for thermal bridges — mould often forms at uninsulated junctions where walls meet floors, ceilings or window reveals
- Move furniture away from external walls — leave a 50 to 100mm gap behind wardrobes and sofas on insulated walls to allow air circulation
- Treat existing mould — clean affected surfaces with a fungicidal wash, allow to dry fully and repaint with anti-mould paint before addressing the root cause
The root cause of post-insulation damp is almost always insufficient ventilation rather than a problem with the insulation itself. Modern homes should aim for 0.5 air changes per hour to remove excess moisture without losing significant heat. If mould appeared within weeks of insulation being installed, a ventilation assessment by a qualified surveyor should be your first step.
Why Damp After Insulation Is So Common
Before insulation upgrades, most UK homes were unintentionally ventilated through gaps, cracks, and draughts. Cold air leaked in and warm, moist air leaked out. This natural air exchange kept indoor humidity levels manageable, even if it wasted enormous amounts of energy. When you install insulation and seal those gaps, you dramatically reduce this accidental ventilation.
The result is that moisture produced by everyday living, including cooking, bathing, breathing, and drying clothes, has far fewer escape routes. Relative humidity climbs indoors. Research by the Building Research Establishment (BRE) has found that mould risk can triple in homes that are insulated without corresponding ventilation improvements.
A typical household of four people generates between 10 and 15 litres of water vapour per day. In a draughty pre-insulation home, much of this escaped through gaps around windows, doors, and the loft hatch. In a well-sealed, recently insulated home, that moisture stays inside unless you actively manage it.
Types of Damp: Condensation vs Penetrating Damp vs Rising Damp
Not all damp is caused by insulation. Before you can fix the problem, you need to identify which type you are dealing with.
Condensation damp
This is by far the most common type after insulation work. It occurs when warm, moist air meets a surface that is below its dew point temperature. Classic signs include water droplets on windows, damp patches in room corners at ceiling level, and black mould on walls behind furniture. Condensation damp is worst in winter when the temperature difference between indoor and outdoor air is greatest.
Penetrating damp
This is caused by water entering the building from outside through structural defects. It may be confused with condensation damp but has different characteristics. Penetrating damp typically appears as damp patches on walls that correspond to external features such as missing pointing, cracked render, faulty guttering, or defective flashing. The patches worsen during rainfall and may show tide marks. Insulation does not cause penetrating damp, but it can make it more noticeable because the wall dries more slowly when insulated.
Rising damp
Genuine rising damp is rare and occurs when ground moisture travels upward through masonry that lacks an effective damp-proof course (DPC). It is characterised by a tide mark on ground floor walls, typically no higher than one metre, and salt deposits on the plaster. Insulation upgrades do not cause rising damp, though floor insulation work occasionally disturbs existing DPCs.
Interstitial Condensation: The Hidden Danger in Walls
Surface condensation on windows is visible and obvious. Interstitial condensation is far more insidious because it occurs within the wall construction itself, hidden from view. This is a particular risk when internal wall insulation is installed without adequate vapour management.
Here is how it happens. Warm, moist air from inside the room passes through the internal insulation layer and meets the cold original wall behind it. The temperature at this junction drops below the dew point, and moisture condenses within the wall structure. Over time, this can cause:
- Rot in timber wall plates and floor joists
- Corrosion of wall ties and steel lintels
- Degradation of the insulation material itself
- Mould growth hidden behind the insulation
- Damage to original brickwork or stonework
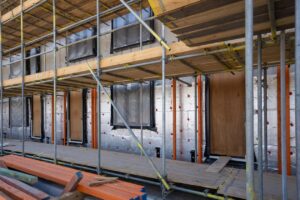
The risk is highest with internal wall insulation on solid-walled properties. A properly installed vapour control layer (VCL) on the warm side of the insulation is essential to prevent moist indoor air reaching the cold wall behind. This is one of the key reasons why professional installation of wall insulation matters, as incorrect VCL detailing is a common cause of interstitial condensation problems.
Ventilation Strategies to Prevent Damp After Insulation
The fundamental principle is simple: if you tighten the building envelope with insulation, you must improve ventilation to compensate. There are several approaches, ranging from free behavioural changes to mechanical systems.
Behavioural changes (free)
- Open trickle vents on windows permanently, even in winter
- Run extractor fans during and for 20 minutes after bathing or cooking
- Avoid drying clothes on radiators; use a vented tumble dryer or outdoor line
- Keep internal doors open to allow air circulation, especially bathroom doors after showering
- Leave a small gap between furniture and external walls to allow air movement
Trickle vents and window upgrades
Building Regulations now require trickle vents in replacement windows. If your double glazing was installed before this requirement, you may lack adequate background ventilation. Retrofitting trickle vents into existing window frames costs around GBP 20 to GBP 40 per window and provides continuous low-level ventilation.
Extractor fans
Approved Document F of the Building Regulations specifies minimum extract rates of 15 litres per second for kitchens and 8 litres per second for bathrooms. Humidity-sensing extractor fans that automatically increase speed when moisture levels rise are a worthwhile upgrade, costing between GBP 80 and GBP 200 installed.
Positive input ventilation (PIV)
PIV systems are one of the most effective solutions for whole-house condensation control. A unit mounted in the loft pushes filtered, tempered air into the home through a ceiling diffuser, creating a slight positive pressure that displaces moist air. Installation costs around GBP 500 to GBP 895 with running costs as low as GBP 7 to GBP 20 per year.
Mechanical ventilation with heat recovery (MVHR)
For deep retrofits where a home has been comprehensively insulated and made very airtight, MVHR provides balanced supply and extract ventilation while recovering up to 95% of the heat from the outgoing air. Installed costs range from GBP 4,000 to GBP 8,000, making it a significant investment best suited to new builds or major renovations.
Insulation Types and Their Damp Risk
Not all insulation materials carry the same moisture risk. Understanding the properties of each type helps you make informed decisions.
| Insulation Type | Moisture Risk | Key Consideration |
|---|---|---|
| Mineral wool (loft) | Low | Breathable; allow ventilation above insulation in cold roof |
| Internal wall insulation (PIR boards) | Medium-High | Requires vapour control layer on warm side |
| External wall insulation | Low | Moves dew point outside the wall; very low condensation risk |
| Cavity wall insulation | Low-Medium | Can bridge the cavity and allow rain penetration in exposed locations |
| Spray foam (open cell) | Medium | Vapour permeable; must be paired with VCL |
| Spray foam (closed cell) | Low | Acts as its own vapour barrier; less breathable |
| Wood fibre boards | Low | Hygroscopic; can absorb and release moisture safely |
When to Call a Specialist Surveyor
While most post-insulation condensation can be resolved with improved ventilation, there are situations that require professional assessment.
- Persistent damp patches on external walls: This may indicate penetrating damp rather than condensation, especially if the patches worsen during rain.
- Musty smell with no visible mould: This could suggest interstitial condensation or hidden mould within the wall construction.
- Timber decay or soft patches in floorboards: Moisture within the structure may be causing timber rot that needs urgent attention.
- Damp below one metre on ground floor walls: This pattern may indicate rising damp or a failed DPC.
- Insulation installed within the last two years under guarantee: If cavity wall insulation or spray foam has been installed recently and damp has appeared, the installer may be liable and should be contacted first.
A qualified damp surveyor, ideally one accredited by the Property Care Association (PCA), can carry out diagnostic tests including moisture meter readings, salt analysis, and thermal imaging to identify exactly what is causing the damp. A proper survey typically costs between GBP 200 and GBP 500 but can save thousands by avoiding incorrect treatments.
Practical Steps to Fix Damp and Mould After Insulation
If you are currently dealing with condensation and mould following an insulation upgrade, here is a step-by-step approach to resolving it.
- Step 1: Confirm the damp is condensation, not penetrating or rising damp. Check whether patches worsen during rain (penetrating) or are limited to the lower wall (rising).
- Step 2: Check all trickle vents are open and extractor fans are working. Replace any non-functional fans.
- Step 3: Address behavioural factors: stop drying clothes on radiators, ventilate after cooking and bathing, move furniture away from external walls.
- Step 4: If condensation persists after two to four weeks, consider a PIV unit for whole-house moisture control.
- Step 5: For existing mould, clean with a fungicidal wash and repaint with anti-mould paint. This treats the symptom while the ventilation improvement addresses the cause.
- Step 6: If the problem is localised to specific cold spots, investigate whether thermal bridging is occurring at lintels or wall junctions and consider targeted insulation improvements.
If you are unsure where to start or suspect the issue is more complex than simple condensation, request a free assessment from our team. We can help diagnose the problem and recommend the most cost-effective solution.
Frequently Asked Questions About Damp After Insulation
Is it normal to get condensation after loft insulation?
It is very common, especially if you have also draught-proofed the home or installed new double glazing at the same time as loft insulation. The combination of better insulation and reduced air leakage traps more moisture indoors. The solution is to ensure you have adequate ventilation, particularly trickle vents, working extractor fans, and ideally a PIV unit.
Can cavity wall insulation cause damp?
In most cases, correctly installed cavity wall insulation does not cause damp. However, in properties in exposed locations with high driving rain, poorly installed cavity insulation can bridge the cavity and allow moisture to track across to the inner leaf. If damp appears on walls after cavity insulation, contact the installer, as removal or remediation may be needed. The Cavity Insulation Guarantee Agency (CIGA) provides a 25-year guarantee for registered installations.
Should I remove insulation if it is causing damp?
In most cases, no. The insulation itself is not causing the damp; the lack of ventilation is. Removing insulation would solve the moisture problem by making the home draughty again, but you would lose all the energy efficiency benefits. The correct approach is to keep the insulation and add appropriate ventilation. The exception is if the insulation has been incorrectly installed, for example internal wall insulation without a vapour control layer, in which case remedial work to the installation is needed.
How long does it take for a new house to dry out after insulation?
If your home has absorbed moisture during the construction or renovation process, it can take 12 to 18 months for the building fabric to dry out fully. During this period, condensation may be worse than normal. Maintaining good ventilation during the drying-out period is essential. A dehumidifier can also help during this initial phase, though it should not be needed long-term.
Will a dehumidifier fix condensation after insulation?
A dehumidifier is a short-term fix, not a long-term solution. It will reduce humidity and limit condensation but costs significantly more to run than a PIV unit, typically GBP 100 to GBP 200 per year in electricity, and only treats the room it is in. A PIV unit provides whole-house ventilation at a fraction of the running cost and requires no ongoing attention beyond an annual filter change.
See what these numbers mean for your home
Free instant estimate — costs, savings, payback and grants for your region.
Related Articles
Home Insulation Costs and Grants: Your Complete 2026 Guide
Update (June 2026): ECO4 closed to new applications in March 2026. Approved installations continue to December 2026. The Warm Homes: Local Grant is now the main funding route for insulation.…
18 May 2026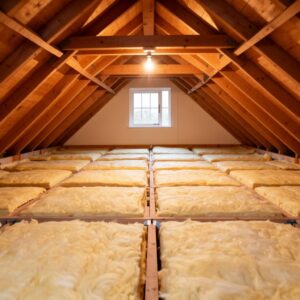
How to Reduce Condensation and Damp While Keeping Your Home Warm
Learn why condensation forms in UK homes, the difference between condensation and rising damp, and proven ventilation strategies to fix damp without losing heat.
8 May 2026
Conservatory Roof Replacement: How a Solid Roof Cuts Energy Bills and Adds Value
Replacing an old polycarbonate or glass conservatory roof with a solid insulated roof can slash heat loss, cut energy bills and turn a seasonal room into a year-round living space.
6 May 2026