How to Insulate and Draught-Proof Your Loft Hatch

Loft hatch insulation is one of the most overlooked energy efficiency improvements in UK homes. You can spend hundreds of pounds insulating your loft to 270mm of mineral wool, only to leave a poorly sealed, uninsulated hatch that leaks warm air into the cold loft space every hour of every day. This simple DIY job costs as little as GBP 15-20 in materials and takes under an hour to complete, yet it can prevent 40-60 kWh of annual energy loss and stop cold draughts dropping into your landing or hallway.
How to Insulate and Draught-Proof a Loft Hatch
- Measure your loft hatch — note the dimensions and check whether it sits flush or recessed into the frame
- Cut rigid insulation board to size — use 50mm PIR board (such as Celotex or Kingspan) and trim it to fit the top of the hatch panel
- Glue the insulation to the hatch — apply grab adhesive evenly and press the board firmly onto the back of the hatch door
- Add a second layer if space allows — two layers of 50mm board gives 100mm total insulation and matches the surrounding loft insulation depth
- Fit foam draught strip around the frame — self-adhesive rubber or foam strip around the hatch opening creates an airtight seal when closed
- Add loft hatch catches or bolts — screw-down catches compress the hatch against the draught strip for a tight fit
An uninsulated, draughty loft hatch is one of the most overlooked sources of heat loss. A 600mm × 600mm hatch without insulation or seals can waste £20 to £50 per year in lost heat. The entire job costs under £20 in materials and takes less than an hour, making it one of the best-value energy improvements you can make.
Why Your Loft Hatch Needs Insulating and Sealing
Your loft hatch is a hole in the ceiling, and that ceiling forms the thermal boundary between your heated living space and the cold loft above. Even when the rest of the loft floor is insulated to the full 270mm recommended depth, the hatch itself is typically just a thin piece of plywood or MDF with no insulation and no airtight seal around its edges.
Heat escapes through the loft hatch in two ways:
- Conduction: Heat passes directly through the thin hatch panel. A 6mm plywood hatch has a U-value of approximately 3.5 W/m2K, compared to the 0.16 W/m2K achieved by the 270mm insulation surrounding it. The hatch is essentially a thermal hole in an otherwise well-insulated ceiling.
- Air leakage: Warm air rises and escapes through gaps around the hatch edges into the loft space. This stack effect means the loft hatch is under constant pressure from warm air trying to find a path upward, particularly in two-storey houses where the hatch is often at the highest point of the building.
Addressing both conduction and air leakage is essential. Insulating the hatch without sealing the edges, or vice versa, only solves half the problem.
Materials You Will Need
Everything needed for this project is available from any UK DIY store, and the total cost is minimal:
- Rigid PIR foam insulation board (50mm thick, e.g. Celotex or Kingspan offcut): GBP 5-10 for a piece large enough to cover the hatch
- Self-adhesive foam draught strip (5-6mm thick, P-profile or D-profile rubber strip): GBP 3-6 per roll
- Strong adhesive (grab adhesive, PVA or contact adhesive): GBP 3-5
- Craft knife or insulation saw: You probably already own one
- Measuring tape
- Optional: Two barrel bolt latches (to compress the hatch against the seal): GBP 3-5 per pair
Total material cost: approximately GBP 15-25.
Step-by-Step: Insulating a Standard Flat Loft Hatch
A standard loft hatch is a flat panel that sits on a timber frame (the lining) within the ceiling opening. It is simply lifted and pushed aside to access the loft. This is the most common type in UK homes.
Step 1: Measure and Cut the Insulation
Measure the top surface of the loft hatch panel. Cut a piece of 50mm PIR rigid foam board to the same dimensions. For the best thermal performance, the insulation should cover the entire top surface without overhanging the edges (overhanging insulation would prevent the hatch from sitting flat in its frame).
If your hatch is a standard size (typically 562mm x 726mm or similar), a single piece of PIR board is sufficient. Use a sharp craft knife or fine-toothed saw to cut the board cleanly.
Step 2: Bond the Insulation to the Hatch
Apply grab adhesive or PVA glue to the top surface of the hatch panel, then press the PIR board firmly onto it. Ensure good contact across the entire surface. Allow the adhesive to cure according to the manufacturer’s instructions before handling the hatch.
The insulation should be bonded to the loft side (top) of the hatch, not the room side. This ensures the insulation sits within the loft space when the hatch is closed, maintaining a clean appearance from below.
Step 3: Apply Draught-Proofing Strip to the Frame
Clean the top edge of the loft hatch frame (the lining that the hatch panel sits on) to remove dust and debris. The adhesive on the draught strip needs a clean, dry surface to bond properly.
Apply self-adhesive foam or rubber draught strip around the entire perimeter of the frame where the hatch sits. P-profile or D-profile rubber strip is preferable to foam because it compresses more evenly and lasts longer. The strip should create a continuous seal around all four edges.
Step 4: Test the Fit
Place the insulated hatch back into position. It should sit on the frame with the draught strip compressing slightly to create a seal. If the insulation makes the hatch too thick to sit properly in the frame, you may need to add small battens to the frame to increase its depth, or use a thinner insulation board (25mm instead of 50mm).
Step 5: Add Compression Latches (Optional but Recommended)
For the best seal, fit two small barrel bolt latches to the hatch, one on each long edge. These latches engage with the frame when the hatch is closed, pulling the panel down onto the draught strip and maintaining compression. Without latches, the hatch relies solely on gravity and the weight of any insulation to compress the seal, which is adequate but not as effective.
Insulating a Hinged Loft Hatch
Hinged loft hatches that swing up or fold down (often with a built-in ladder) require a slightly different approach:
- Weight considerations: Adding heavy insulation to a hinged hatch can strain the hinges and make it difficult to open. Limit insulation thickness to 25-50mm and choose lightweight PIR board rather than mineral wool.
- Hinge side clearance: Ensure the insulation does not interfere with the hinge mechanism. You may need to trim the insulation back from the hinge edge.
- Latch compression: Hinged hatches with built-in latches already provide some compression. Check that the existing latches still engage fully after adding the insulation and draught strip.
- Counter-spring adjustment: If your hinged hatch has counter-balance springs (common on loft ladder hatches), the springs may need adjusting to account for the added weight of the insulation board.
For loft ladder hatches with integrated ladders, some manufacturers offer insulated and sealed hatch systems as replacement units. These cost GBP 200-400 but provide a professional finish with optimised insulation and sealing.
How Much Energy Does Loft Hatch Insulation Save?
The energy saving from insulating and sealing a loft hatch depends on the size of the hatch, the temperature difference between the living space and loft, and how draughty the existing hatch is.
For a standard-sized loft hatch (approximately 0.4m2):
- Before insulation: Heat loss through the hatch is approximately 40-60 kWh per year through conduction alone, plus additional losses from air leakage
- After insulation (50mm PIR + draught strip): Heat loss is reduced to approximately 5-10 kWh per year
- Annual saving: Approximately 30-50 kWh, equivalent to roughly GBP 3-5 per year at current gas prices
The monetary saving from the hatch alone is modest, which is why many homeowners overlook it. However, the draught-proofing element provides an additional comfort benefit that is harder to quantify but immediately noticeable: the cold draught that previously dropped through the hatch onto the landing below is eliminated, making the upstairs hallway noticeably more comfortable.
More importantly, an unsealed loft hatch undermines the performance of the rest of your loft insulation. Warm moist air escaping through the hatch can condense on cold surfaces in the loft, potentially causing damp problems. Sealing the hatch is essential to maintain the integrity of your loft insulation system.
Additional Tips for Maximum Performance
- Match the insulation depth to your loft insulation: While 50mm of PIR board provides good improvement, it is still thermally weaker than the 270mm of mineral wool surrounding the hatch. For the best performance, consider bonding two layers of 50mm PIR (total 100mm) to the hatch. This gives an R-value of approximately 4.5, much closer to the surrounding insulation.
- Seal any gaps in the lining: The timber lining that forms the loft hatch opening may have gaps where it meets the ceiling. Fill these with decorators’ caulk or expanding foam before applying the draught strip.
- Consider a proprietary insulated hatch: Companies like Manthorpe produce ready-made insulated and sealed loft hatches that drop into standard openings. At GBP 40-80, these are a convenient alternative to DIY modification.
- Do not forget the hatch in the garage or extension: If you have a secondary loft hatch above an unheated garage or lean-to extension, it needs the same treatment as the main hatch.
This small project pairs well with other whole-house improvements. Combining loft hatch sealing with comprehensive loft insulation, double glazing and a heating upgrade such as a heat pump or modern boiler creates a joined-up approach to energy efficiency. Get a free quote to see what improvements are available for your home.
Frequently Asked Questions
What type of insulation is best for a loft hatch?
PIR rigid foam board (such as Celotex or Kingspan) is the best choice because it provides the highest thermal resistance per millimetre. A 50mm PIR board has an R-value of approximately 2.27 m2K/W, which is equivalent to approximately 80mm of mineral wool. It is also lightweight, easy to cut and bonds well to plywood or MDF hatch panels. Do not use mineral wool directly on the hatch, as it is too heavy and cannot be bonded flat.
How often should draught strip be replaced on a loft hatch?
Self-adhesive foam strip typically lasts 3-5 years before it compresses permanently and loses its sealing ability. Rubber strip (P-profile or D-profile) lasts longer, typically 5-10 years. Check the condition of the strip annually when you access the loft and replace it when it no longer springs back to shape after compression.
Will insulating the loft hatch cause condensation?
No. Insulating and sealing the loft hatch actually reduces condensation risk in the loft space by preventing warm moist air from the rooms below from entering the cold loft. Condensation in lofts is primarily caused by moisture-laden air from the living space rising through gaps in the ceiling (including unsealed loft hatches) and condensing on cold roof timbers and felt. A well-sealed hatch is part of the solution, not the problem.
Should I insulate the loft hatch if I use the loft for storage?
Yes, absolutely. Using the loft for storage does not mean the loft is heated. The loft space above the insulation is still cold, and the hatch still represents a weak point in the thermal envelope. Insulate and seal the hatch regardless of how you use the loft. If you access the loft frequently, a hinged hatch with counter-balance springs and proper latches makes regular access easier while maintaining the seal.
See what these numbers mean for your home
Free instant estimate — costs, savings, payback and grants for your region.
Related Articles
Home Insulation Costs and Grants: Your Complete 2026 Guide
Update (June 2026): ECO4 closed to new applications in March 2026. Approved installations continue to December 2026. The Warm Homes: Local Grant is now the main funding route for insulation.…
18 May 2026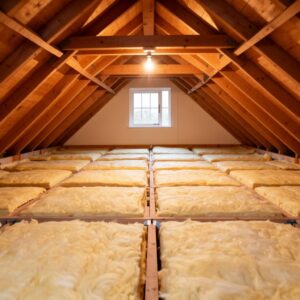
How to Reduce Condensation and Damp While Keeping Your Home Warm
Learn why condensation forms in UK homes, the difference between condensation and rising damp, and proven ventilation strategies to fix damp without losing heat.
8 May 2026
Conservatory Roof Replacement: How a Solid Roof Cuts Energy Bills and Adds Value
Replacing an old polycarbonate or glass conservatory roof with a solid insulated roof can slash heat loss, cut energy bills and turn a seasonal room into a year-round living space.
6 May 2026