Weather Compensation Explained: How Your Heat Pump Saves Energy
Heat pump weather compensation is arguably the single most important setting for maximising your heat pump’s efficiency and minimising running costs. It works by automatically adjusting the flow temperature of water to your radiators or underfloor heating based on the outdoor temperature. When it is milder outside, the system reduces the flow temperature; when it is colder, it increases it. This seemingly simple concept can improve your heat pump’s COP by 15-30% compared to running at a fixed flow temperature, saving hundreds of pounds per year.
What Is Weather Compensation on a Heat Pump?
Weather compensation is a control strategy that automatically adjusts your heat pump’s flow temperature based on the outdoor air temperature. When it is mild outside, the system reduces the flow temperature to 30–35°C; when it is freezing, it increases to 40–50°C. This ensures your home stays comfortable while the heat pump operates at the lowest possible flow temperature, maximising efficiency and reducing electricity consumption by 15–25% compared to a fixed flow temperature.
Every heat pump has a weather compensation curve that maps outdoor temperatures to flow temperatures. A correctly set curve is the single most important factor in heat pump performance. If your home takes too long to warm up on cold days, the curve needs steepening. If radiators feel excessively hot during mild weather, the curve should be flattened. Most manufacturers recommend running the system for two to four weeks before fine-tuning the curve to match your home’s actual heat loss.
What Is a Weather Compensation Curve?
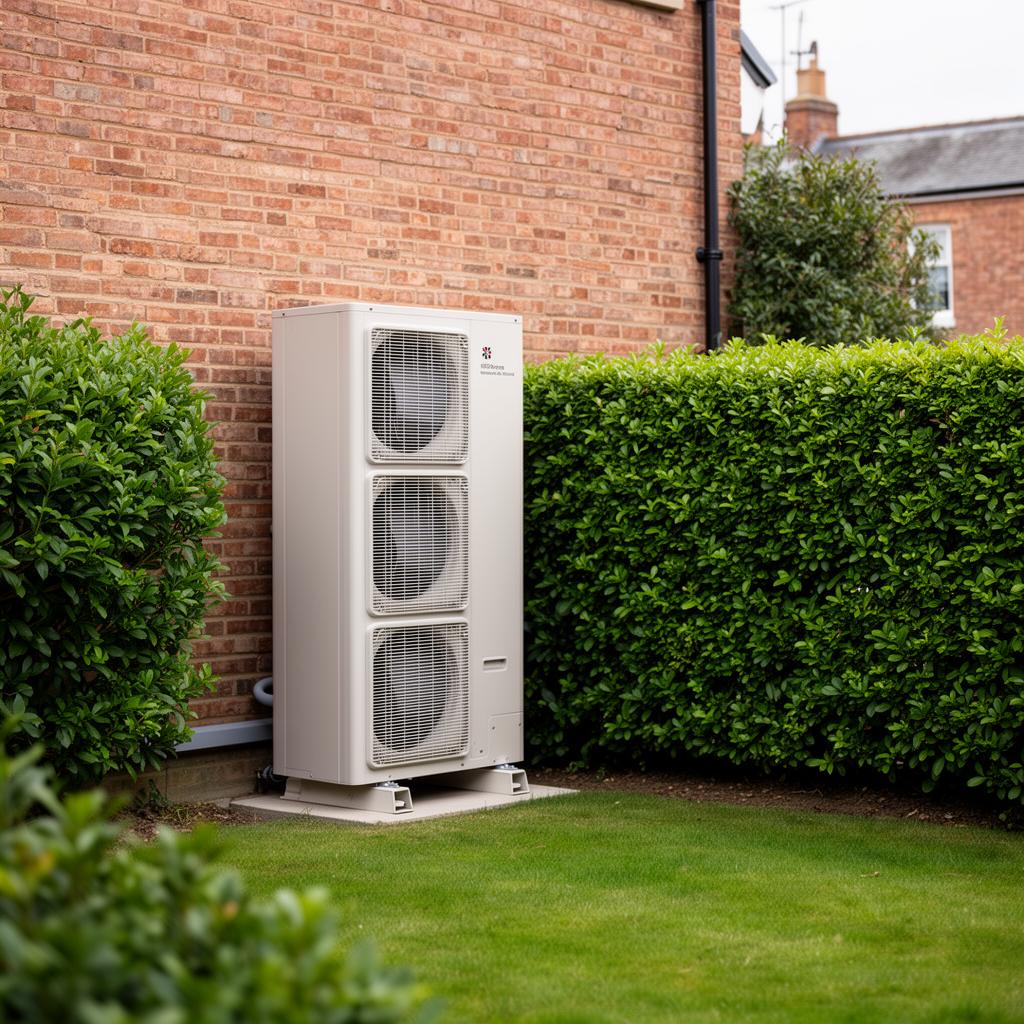
A weather compensation curve is a graph that maps outdoor temperature to flow temperature. The heat pump uses an outdoor temperature sensor (mounted on a north-facing wall) to read the current conditions and then sets the flow temperature according to the curve. The curve is configured during installation and can be adjusted afterwards to fine-tune performance.
A typical weather compensation curve for a UK home might look like this:
| Outdoor Temperature | Flow Temperature (Radiators) | Flow Temperature (UFH) |
|---|---|---|
| -3C | 50C | 40C |
| 0C | 47C | 37C |
| 5C | 42C | 34C |
| 10C | 35C | 30C |
| 15C | 28C | 25C |
The curve is not a single fixed line but can be adjusted in two ways: the slope (how steeply the flow temperature rises as outdoor temperature drops) and the offset (shifting the entire curve up or down). Getting these settings right for your specific home is where the efficiency gains come from.
Why Every 1C Reduction in Flow Temperature Matters
The fundamental principle of heat pump weather compensation is that heat pumps are more efficient at lower flow temperatures. For every 1C reduction in flow temperature, the heat pump’s COP improves by approximately 1.5-2.5%. This relationship is rooted in the thermodynamics of the refrigerant cycle and applies to all heat pump brands and models.
To illustrate the impact: a heat pump running at a fixed flow temperature of 50C might achieve a COP of 3.0. The same unit running at 40C achieves a COP of approximately 3.5, and at 35C approximately 3.8. Over a heating season, the weather-compensated system spends most of its operating hours at lower flow temperatures (because the UK is rarely below freezing), resulting in a significantly higher seasonal average COP.
For a typical UK home with 12,000kWh annual heat demand at current electricity prices of 24.5p/kWh:
| Scenario | Average Flow Temp | SCOP | Annual Cost | Saving vs Fixed |
|---|---|---|---|---|
| Fixed flow at 50C | 50C | 3.0 | £980 | – |
| Weather comp (well set) | 38C average | 3.7 | £795 | £185 |
| Weather comp (optimised) | 35C average | 4.0 | £735 | £245 |
The difference between a fixed 50C flow temperature and well-optimised weather compensation can save £185-£245 per year. Over the 20-year lifespan of a heat pump, this amounts to £3,700-£4,900 in cumulative savings from a single setting adjustment.
How to Tell If Your Weather Compensation Is Set Correctly
Many UK heat pump installations have weather compensation enabled but poorly configured. Research from the Electrification of Heat Demonstration Project found that a significant proportion of installations were running at higher flow temperatures than necessary, leaving substantial efficiency gains on the table.
Signs that your weather compensation curve is set too high (too aggressive):
- Your home feels too warm much of the time
- Rooms overshoot the thermostat setpoint regularly
- The heat pump cycles on and off frequently (short cycling)
- Your flow temperature rarely drops below 45C even in mild weather
Signs that your weather compensation curve is set too low (not aggressive enough):
- The house struggles to reach temperature on cold days
- The heat pump runs continuously but rooms feel cool
- It takes a very long time to warm up after a setback period
- You are tempted to override the system with boost mode regularly
The ideal setting delivers the lowest flow temperature that keeps your home at the desired temperature during the coldest weather you experience. On milder days, the flow temperature should drop noticeably. If you have a monitoring app (myVaillant, Onecta, SmartThings, MELCloud), check that flow temperatures are varying throughout the day in response to outdoor temperature changes.
Setting Up Weather Compensation: Step by Step
Your installer should configure weather compensation during commissioning, but many homeowners find the initial settings need refinement over the first heating season. Here is how to approach the optimisation:
Step 1: Confirm the outdoor sensor is correctly positioned. The sensor should be on a north-facing wall, at least 2 metres above ground level, away from direct sunlight, exhaust vents, and the heat pump’s own air discharge. A poorly positioned sensor gives incorrect readings and undermines the entire system.
Step 2: Start with a conservative curve. Begin with the manufacturer’s default curve for your heat emitter type (radiators or underfloor heating). This ensures the home is adequately heated while you learn the system’s behaviour.
Step 3: Gradually reduce the curve. Over several days at each setting, lower the curve by 1-2C and observe the impact on room temperature. If the home maintains temperature comfortably, lower it again. Continue until you find the lowest curve setting that keeps the home at the desired temperature during the coldest conditions.
Step 4: Fine-tune the offset. If the house is consistently slightly too warm or too cool across all outdoor temperatures, adjust the offset (sometimes called the parallel shift) rather than the slope. This shifts the entire curve up or down without changing its shape.
Step 5: Check during cold snaps. The true test of your weather compensation setup is during the coldest weather of the year. If the home drops below target temperature during a cold snap, raise the curve slightly. If it remains comfortable, your settings are well-optimised.
Weather Compensation and Radiator Sizing
Weather compensation works best when radiators are sized to deliver sufficient heat at lower flow temperatures. Standard radiators sized for a gas boiler at 70C flow temperature will not deliver their rated output at 40C. The relationship between flow temperature and radiator output is not linear:
- At 50C flow, a standard radiator delivers approximately 50% of its rated output
- At 45C flow, it delivers approximately 40%
- At 40C flow, it delivers approximately 30%
This means radiators may need to be 2-3 times larger than the standard gas boiler specification to work effectively with weather-compensated heat pump flow temperatures of 35-45C. Alternatively, underfloor heating is designed to work at 25-40C and pairs naturally with weather compensation.
Improving insulation reduces the heat output needed from each radiator, making it possible to run at lower flow temperatures without upsizing radiators. This is another reason why insulation upgrades before or alongside heat pump installation deliver compounding efficiency benefits.
Common Weather Compensation Mistakes
Several common mistakes undermine weather compensation performance in UK installations:
Using room thermostat override: If the room thermostat frequently cycles the heat pump on and off, the weather compensation curve may be set too high. The system should run continuously at the correct flow temperature, not cycling in response to thermostat calls. Consider turning the room thermostat up to 22-23C and letting weather compensation control the actual output.
Outdoor sensor in direct sunlight: A sensor exposed to afternoon sun will read a higher temperature than the actual air temperature, causing the system to reduce flow temperature too aggressively on sunny but cold winter days. This leads to under-heating in the late afternoon and evening.
Not adjusting for seasonal changes: Some homeowners set the curve in autumn and never revisit it. Spending 10 minutes checking and adjusting the curve at the start of December (when real cold weather begins) and again in February (when milder spells become more common) can fine-tune performance throughout the season.
Disabling weather compensation entirely: Some homeowners or even installers disable weather compensation in favour of fixed flow temperature operation because it is simpler to understand. This sacrifices 15-30% of the available efficiency and should only be done as a last resort if the system cannot be configured correctly. If your installer has disabled weather compensation, ask them to re-enable and properly configure it, or seek a second opinion from a Heat Geek-accredited installer.
If you are unsure whether your weather compensation is properly configured, request a system review from an experienced heat pump installer who can assess and optimise your settings.
Frequently Asked Questions
Do all heat pumps have weather compensation?
All modern heat pumps from major brands (Vaillant, Daikin, Mitsubishi, Samsung, Grant, Nibe) include weather compensation as a standard feature. It requires an outdoor temperature sensor, which should be included in every installation. If your heat pump does not have an outdoor sensor fitted, ask your installer to add one, as it is essential for optimal performance.
Can I adjust the weather compensation curve myself?
On most heat pump controllers and apps, yes. The adjustment is typically accessible through the settings menu under heating curve, weather compensation, or climate curve options. Make small adjustments (1-2C at a time) and allow 2-3 days at each setting to assess the impact before making further changes.
Does weather compensation work with radiators and underfloor heating?
Yes, it works with both, but the curve settings are different. Underfloor heating typically uses a lower curve (25-40C range) while radiators need a higher curve (30-50C range). If your home has both radiators and underfloor heating, the system should use a mixing valve to deliver different flow temperatures to each circuit, each with its own compensation curve.
Should I turn weather compensation off at night?
No. Heat pumps perform best when running continuously at low output rather than cycling between setback and recovery periods. Weather compensation should remain active 24 hours a day. If you want to reduce heating at night, lower the room thermostat setpoint by 1-2C rather than disabling weather compensation.
How much money does weather compensation save?
Compared to running at a fixed flow temperature, properly configured weather compensation typically saves £150-£300 per year for a standard UK home. The exact saving depends on your home’s insulation, the heat emitter type, and how well the curve is optimised. Over the heat pump’s 20-year lifespan, cumulative savings of £3,000-£6,000 are realistic.
See what these numbers mean for your home
Free instant estimate — costs, savings, payback and grants for your region.
Related Articles
Heat Pump Installation Costs in 2026: The Real Numbers
Heat pumps are now the default replacement for gas boilers in UK government policy, but the question most homeowners ask first is always the same: how much does it actually…
28 May 2026
Infrared Panels vs Heat Pumps: Which Heating System Is Right for Your Home?
Comparing infrared panels vs heat pumps across cost, efficiency, running expenses, and grant eligibility. This guide helps UK homeowners choose the right low-carbon heating system for their property.
8 May 2026
Renewable Heating vs Gas Boiler: An Honest Cost and Comfort Comparison
An honest comparison of heat pumps, biomass and solar thermal against gas boilers on cost, comfort, maintenance, grants and carbon savings for UK homes.
8 May 2026